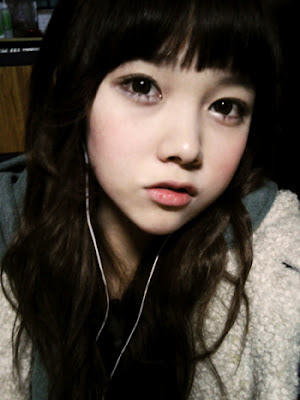
I will use this picture for this tutorial, I’m not owner of this picture, I found it on google.
 |
| Original Picture |
First, Open the image, and duplicate the image and make a duplicate of your background with click Background (on layer, usually appear in left-bottom side) and drag it to new layer.
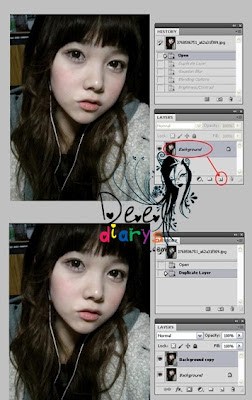 |
| Duplicate layer Background |
After you duplicate the image, again click background to make this layer as active layer, then go to Filter – Blur – Gaussian blur (this panel is on top of your photoshop windows).
 |
| Blur adjustment |
Select layer ‘Background Copy’ and right click on it, and choose blending option. See blend mode “normal” change it to “overlay” and arrange the opacity to 50% (or adjust it like you want) then click “OK”.
 |
| Blending mode |
Go to Image – Adjustments – Brightness/ Contrast, then adjust the brightness and contrast, depend on your taste, click “OK”.
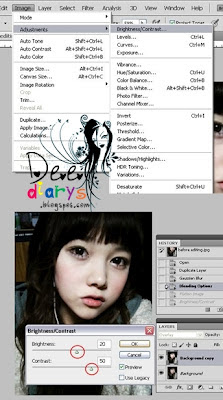 |
| Brightness/ Contrast adjustment |
Go to Layer and choose Flatten Image
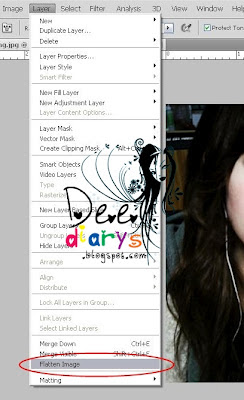 |
| Flatten Image |
Go to Image – Adjustments – Photo Filter, choose warming filter 85, and adjust density to 25% or depend on your taste.
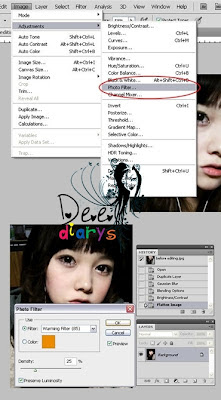 |
| Photo filter |
We’re done! This is the result of this tutorial \( ̄ー\)(/ー ̄)/
 |
After
cr: deediarys.blogspot.com
TAKE OUT WITH FULL CREDIT
|


Tidak ada komentar:
Posting Komentar